


What Do Nits Look Like? The Ultimate Guide to Identifying Head Lice
Head lice. The words themselves can conjure up images of itchy scalps and frustrating removal efforts. But before you panic, understanding what nits look like is the first and most crucial step in tackling a head lice infestation. This comprehensive guide will equip you with the knowledge you need to accurately identify nits (also known as lice eggs) and distinguish them from other common scalp debris. We’ll cover everything from their appearance and location to how to tell them apart from dandruff and other imposters.
Understanding the Enemy: What are Nits?
Nits are the eggs of head lice (Pediculus humanus capitis). These tiny parasites lay their eggs on human hair, close to the scalp, where the temperature and moisture are ideal for hatching. Identifying nits correctly is critical for effective treatment and preventing the spread of these pesky creatures.
Decoding the Appearance of Nits: A Visual Guide
Knowing what to look for is half the battle. Nits have distinct characteristics that set them apart from other scalp conditions.
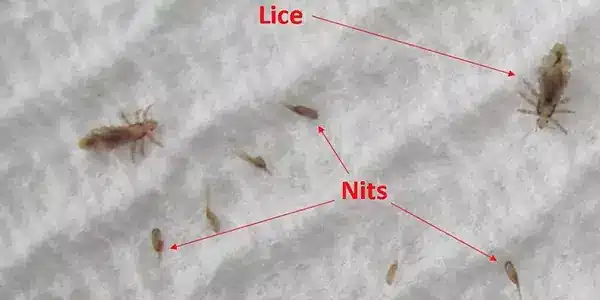
- Shape and Size: Nits are oval-shaped and incredibly small, often resembling tiny sesame seeds. They are approximately 0.8 mm long and 0.3 mm wide.
- Color: The color of a nit can vary depending on its age and whether it’s alive or dead.
- Live Nits: Typically appear tan, brown, or even yellowish.
- Empty or Dead Nits: Often appear translucent, whitish, or clear. They may also look more shriveled.
- Attachment: Nits are firmly attached to the hair shaft with a glue-like substance secreted by the female louse. They are difficult to remove and will not easily slide off the hair.
- Location: Nits are most commonly found close to the scalp, especially around the ears and the nape of the neck. This is because the warmth and humidity near the scalp are ideal for incubation.
- Visibility: Nits are often easier to spot in bright light, especially when the hair is damp or combed with a fine-toothed lice comb.
Differentiating Nits from Other Scalp Debris
It’s easy to mistake nits for other common scalp conditions. Here’s how to tell the difference:
- Dandruff:
- Appearance: Dandruff flakes are usually white or yellowish and irregular in shape. They are often larger and more easily dislodged from the hair.
- Attachment: Dandruff flakes are loose and easily shake off the hair.
- Location: Dandruff is typically found throughout the hair and on the shoulders.
- Hair Casts:
- Appearance: Hair casts are the sheaths of the hair follicle. They are usually white or translucent and wrap around the hair shaft, resembling a tiny sleeve.
- Attachment: Unlike nits, hair casts are not firmly attached to the hair.
- Location: Hair casts are usually found on the hair shaft and can be moved up and down the hair.
- Hair Products:
- Appearance: Residue from hair products can sometimes resemble nits.
- Attachment: Hair product residue is easily removed from the hair.
- Location: Residue is often found throughout the hair, particularly where product is applied.
The Importance of Accurate Identification
Correctly identifying nits is crucial for several reasons:
- Effective Treatment: Applying the appropriate treatment only makes sense when you know if you have a lice infestation.
- Preventing Over-Treatment: Over-treating the hair with lice treatments can be harmful and ineffective.
- Preventing Spread: Early detection and treatment can minimize the spread of lice to others.
- Peace of Mind: Knowing the difference between nits and other debris can alleviate unnecessary worry.
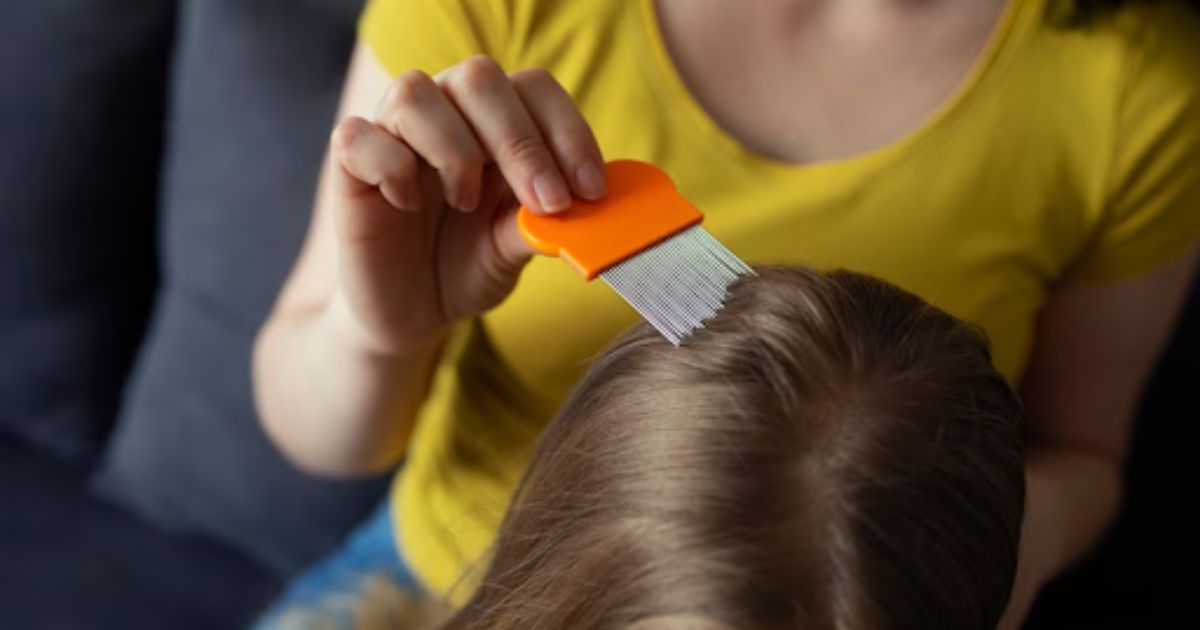
How to Check for Nits
- Good Lighting: Use a well-lit area, preferably with natural light.
- Part the Hair: Part the hair in small sections, especially around the ears and the nape of the neck.
- Use a Lice Comb: A fine-toothed lice comb is essential for detecting and removing nits. Comb through each section of hair from root to tip.
- Examine the Comb: After each stroke, wipe the comb on a white cloth or paper towel to check for nits.
- Repeat: Repeat the process throughout the entire head.
Treatment and Next Steps
If you find live nits, it’s essential to consult with a healthcare professional or pharmacist for treatment options. These may include over-the-counter or prescription lice treatments. Be sure to follow the instructions carefully and remove all nits. Check the hair again in 7-10 days to ensure the lice are gone.
Conclusion: Mastering the Art of Nit Identification
Identifying nits is a key skill in managing head lice infestations. By understanding their appearance, location, and how they differ from other scalp debris, you can confidently take the necessary steps for effective treatment and prevention. Remember to be thorough and patient, and don’t hesitate to seek professional advice if you have any concerns.
Frequently Asked Questions (FAQs)
1. Can you see nits with the naked eye?
While technically visible, nits are very small and can be difficult to spot without close inspection. Using a good light source and a lice comb significantly improves visibility.
2. How long do nits stay attached to the hair?
Nits remain attached to the hair until they hatch or are removed. Empty or dead nits may remain attached for a while, but they will eventually detach.
3. Are all nits alive?
No. Nits that are tan or brown are more likely to be viable. Empty or dead nits appear translucent, whitish, or clear.
4. Can you get rid of nits without using chemicals?
Yes, mechanical removal with a fine-toothed lice comb is an important part of lice removal. It may take several sessions to remove all the nits. Some people also use natural remedies, but their effectiveness varies and is often not scientifically proven.
5. How do I know if the treatment I used worked?
The best way to determine if the treatment worked is to comb through the hair with a lice comb 7-10 days after treatment. Look for any live lice or new nits. If you find either, you may need to repeat the treatment.
